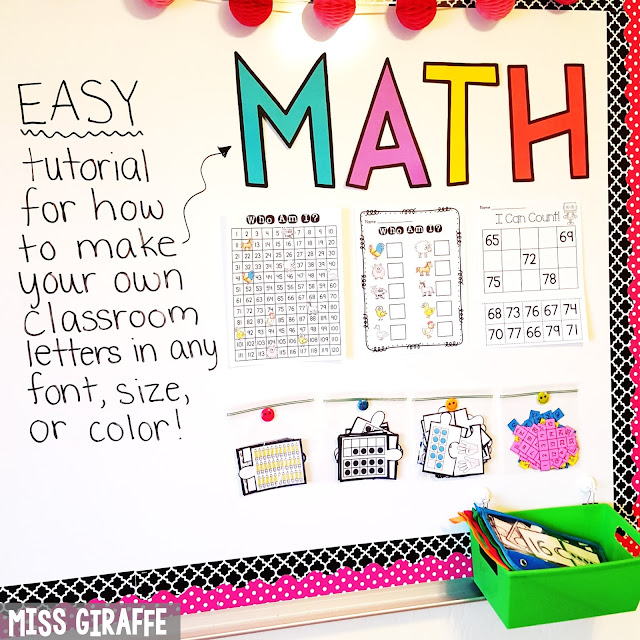
Making bulletin board letters is super easy and, best of all, cheap! All you need is colorful paper and a printer to print in black ink! Then you can label your entire classroom as much as you want for super cheap!
This easy step by step tutorial is using PowerPoint on a PC. It may be different on a Mac or with a different version of PowerPoint but I am guessing it's pretty similar! I can help you if you need it in the comments section - I'll help provide support so feel free to ask any questions there!
This is to make your own bulletin board letters in any font/color/size/etc. that you want like the MATH letters on my math board. Big colorful letters are perfect for making "Word Wall," "Our Best Work," or any board you want to title!
If you want to see the math activities on the board, I show those fun activities in action in my Building Number Sense in First Grade post with a ton of ideas for how to introduce numbers in the beginning of the year!
Okay let's get started!
Step 1: Open a new, blank PowerPoint slide and make it paper sized
This is the most tech-y seeming step but I promise it's easy and, once you do it once or twice, you'll be able to do it in your sleep.When you open a new presentation, it will most likely default to "Widescreen" and be widescreen sized and landscape. I prefer to make the page "Portrait" by clicking on DESIGN at the top and then the drop-down box SELECT SIZE and then CUSTOM SLIDE SIZE.
A box will pop up.
Under SLIDES SIZED FOR, select LETTER PAPER (8.5 x 11 in) and under ORIENTATION, click on PORTRAIT.
This will give you a normal page in PowerPoint that you can print on regular copy paper. I do this before creating anything! This makes it so the page prints out portrait style on a regular piece of copy paper. :)
Step 2: Insert a text box in a fun font
Now for the fun part! Choose the font you want to use! I LOVE fonts. There are a ton of free fonts for personal use on TpT. For this example, I am using KG Shake It Off Chunky which is one of my (many) favorites.
Click on INSERT.
Click on TEXT BOX. Click somewhere on the page, holding down your mouse, drag your mouse diagonally to create a box, and then let go. It doesn't matter how big you make the text box or where you put it - you can change all that later.
Type the first letter you want to make inside the text box.
Highlight the letter with your mouse.
Choose the font you want to use.
Make it the size you want by typing a number in the box for font size (usually a drop down to the right of the name of the font). I typed in 600 for my example.
To move the letter to where you want it on the page, click on the dotted line of the text box to make it a solid line which allows you to select the whole box. Then you can drag that box around to where you want it with your mouse. Make sure your letter stays in the white (that's the page and what it will look like when it prints).
It should look something like this....
Step 3: Make the font an outline
Highlight the letter by clicking on one side of the letter and dragging to the other side then let go. This should make a gray box over the letter like this:
Right click on the gray box that highlights the letter.
A little box will pop up. Click on Format Text Effects.
This will pop up a little menu on the right hand side.
Click on the A with the little rectangle under it. (It looks just like the A with a rectangle under it that you always click on to change font colors.)
Click on Text Fill. Click on No Fill. Your letter will disappear for a second, not to worry, it's supposed to.
Next, click on Text Outline. Click on Solid Line. Your letter should reappear as an outline (most likely in blue).
Under Color, click on the paint bucket to change it to black.
Then you'll see a box a little under that called Width. It's most likely at 0.75. Make it as thick as you want... play with it clicking the arrows up and down until you get the thickness you want. For my example, I used 18 pt so I clicked the up arrow a lot. :) [If you don't want a border and want just the letter in a bright color with no border, leave it at 0.75 so you have a super thin line to follow when cutting it out.]
Now it should look like this:
Now it should look like this:
Congratulations, you made your letter!!!!
Repeat for whatever other letters you're trying to make for whatever you're spelling out. You can easily do this by clicking on the slide you just made on the left hand side where it shows a small version of the slide. Once you click on the slide, hold down CTRL + D (hold down the the Ctrl key on your keyboard and press the letter D). This will duplicate the slide in an exact copy so you can simply just change the letter. You can press CTRL+D as many times as you need to spell anything you want! :)
Repeat for whatever other letters you're trying to make for whatever you're spelling out. You can easily do this by clicking on the slide you just made on the left hand side where it shows a small version of the slide. Once you click on the slide, hold down CTRL + D (hold down the the Ctrl key on your keyboard and press the letter D). This will duplicate the slide in an exact copy so you can simply just change the letter. You can press CTRL+D as many times as you need to spell anything you want! :)
Step 4: Print your letters onto the color paper you want them to be in
Choose the colors you want the letters to be and print the outline on that color paper.
Step 5: Cut out the letters
Simply cut out the letters! I personally like to leave the black wide border on them and cut it out around the edge.
If you want letters with no borders to just be that letter in a bright color, you would've left the width at 0.75 in step 3 so just cut it out with that line.
For letters that have insides, I recommend using a little hand knife from the craft store to cut the inside pieces out like this:
This is the mat for my rotary cutter which I love for cutting out centers. You can see it on this list of Classroom Must Haves full of awesome things for the classroom which also has the bright paper I use and other fun goodies.
So now you're done!!!! GO LABEL THE WORLD! ....or at least your classroom! :)
You can do this to create so many bulletin board labels for your classroom! Your word wall, your math wall, your student work board, whatever! Create and label to your heart's content! I just love making my own letters because it's so cheap - just color paper and black ink - and I can make them HUGE to brighten up any display. I really hope you loved this tutorial! Please let me know in the comments if you have any questions or need help! I'll respond on that post to help you out. :)
Please let me know in the comments below if this tutorial was helpful for you! :)
I'd also love if you took a moment to follow me on TeachersPayTeachers, Pinterest, Facebook, and Instagram for more fun ideas like this. Thanks!
Check out these other fun posts:
20 Classroom Management Strategies You Can Start Right Away
New to First Grade? Everything You Need to Know!
Classroom Routines and Procedures Checklist
25 Chatty Class Classroom Management Strategies
20 Classroom Management Strategies You Can Start Right Away
New to First Grade? Everything You Need to Know!
Classroom Routines and Procedures Checklist
25 Chatty Class Classroom Management Strategies
Short A Activities & Resources (has a TON of ideas for short vowels centers and activities)
Building Number Sense in First Grade
Fact Fluency in First Grade
Bottle Cap CVC Word Building Centers
Building Number Sense in First Grade
Fact Fluency in First Grade
Bottle Cap CVC Word Building Centers
Tips for Building Reading Fluency
Phonics Fluency Notebooks
Secret Sight Words
Writing Crafts that are NO PREP... Seriously!
Phonics Fluency Notebooks
Secret Sight Words
Writing Crafts that are NO PREP... Seriously!
Also - don't forget to join Miss Giraffe's Class so you never miss out on fun ideas and exclusive free stuff from me only for subscribers!
Here's a picture for you to pin if you want to save this to read again later! :)
Here's a picture for you to pin if you want to save this to read again later! :)


